Then write why it is your favourite on your blog.
Monday, September 10, 2018
Favourite Photo
Then write why it is your favourite on your blog.
Wednesday, September 5, 2018
Photo 1 (AKA Photo 9) Outline
Elliott Erwitt
Photography is an excellent way to
capture the moment and hold memories. It is the contents in the family album,
and the essence of human history. Upon completing Photography 1, students learn
how to use the camera as creative tool to document the world around them. Students
will learn photographic concepts and processes from digital to film processes:
they will understand basic properties of light, composition, and darkroom
processes from developing B/W film to enlarging images, and have an
introduction with computer imaging.
- Blog/Journal- Design a blog/journal that includes inspiring photos from magazines/internet, and your personal work. There will be small deadlines and a final submission- This will be on going throughout the semester.
- Elements of Design- The basic elements of Photography: lines, shapes, form, colour/tone, textures. We are going to focus on each of these one at a time.
- Composition- Learn how to identify your subject and how to direct attention towards it.
- Lumen Print/Pin Hole- Create a simple photographic composition without a camera.
- Learn about light. Take photos with a basic box.
- Computer Manipulation- Learn basic image Photoshop. How to touch-up and manipulate your images digitally.
- Shutter- Learn how to use the shutter to manipulate movement with a digital or manual camera.
- BW Portraits- Photograph people using Black and White film; develop and print in the darkroom.
Evaluation
will be based on the following:
Question Sheets and Vocabulary (knowledge): 10%
Journal (display knowledge of concepts, gather
ideas): 20%
Contact Sheets (skill):10%
Projects /Prints (skill): 60%
Photo 2 (aka Photo10) Outline
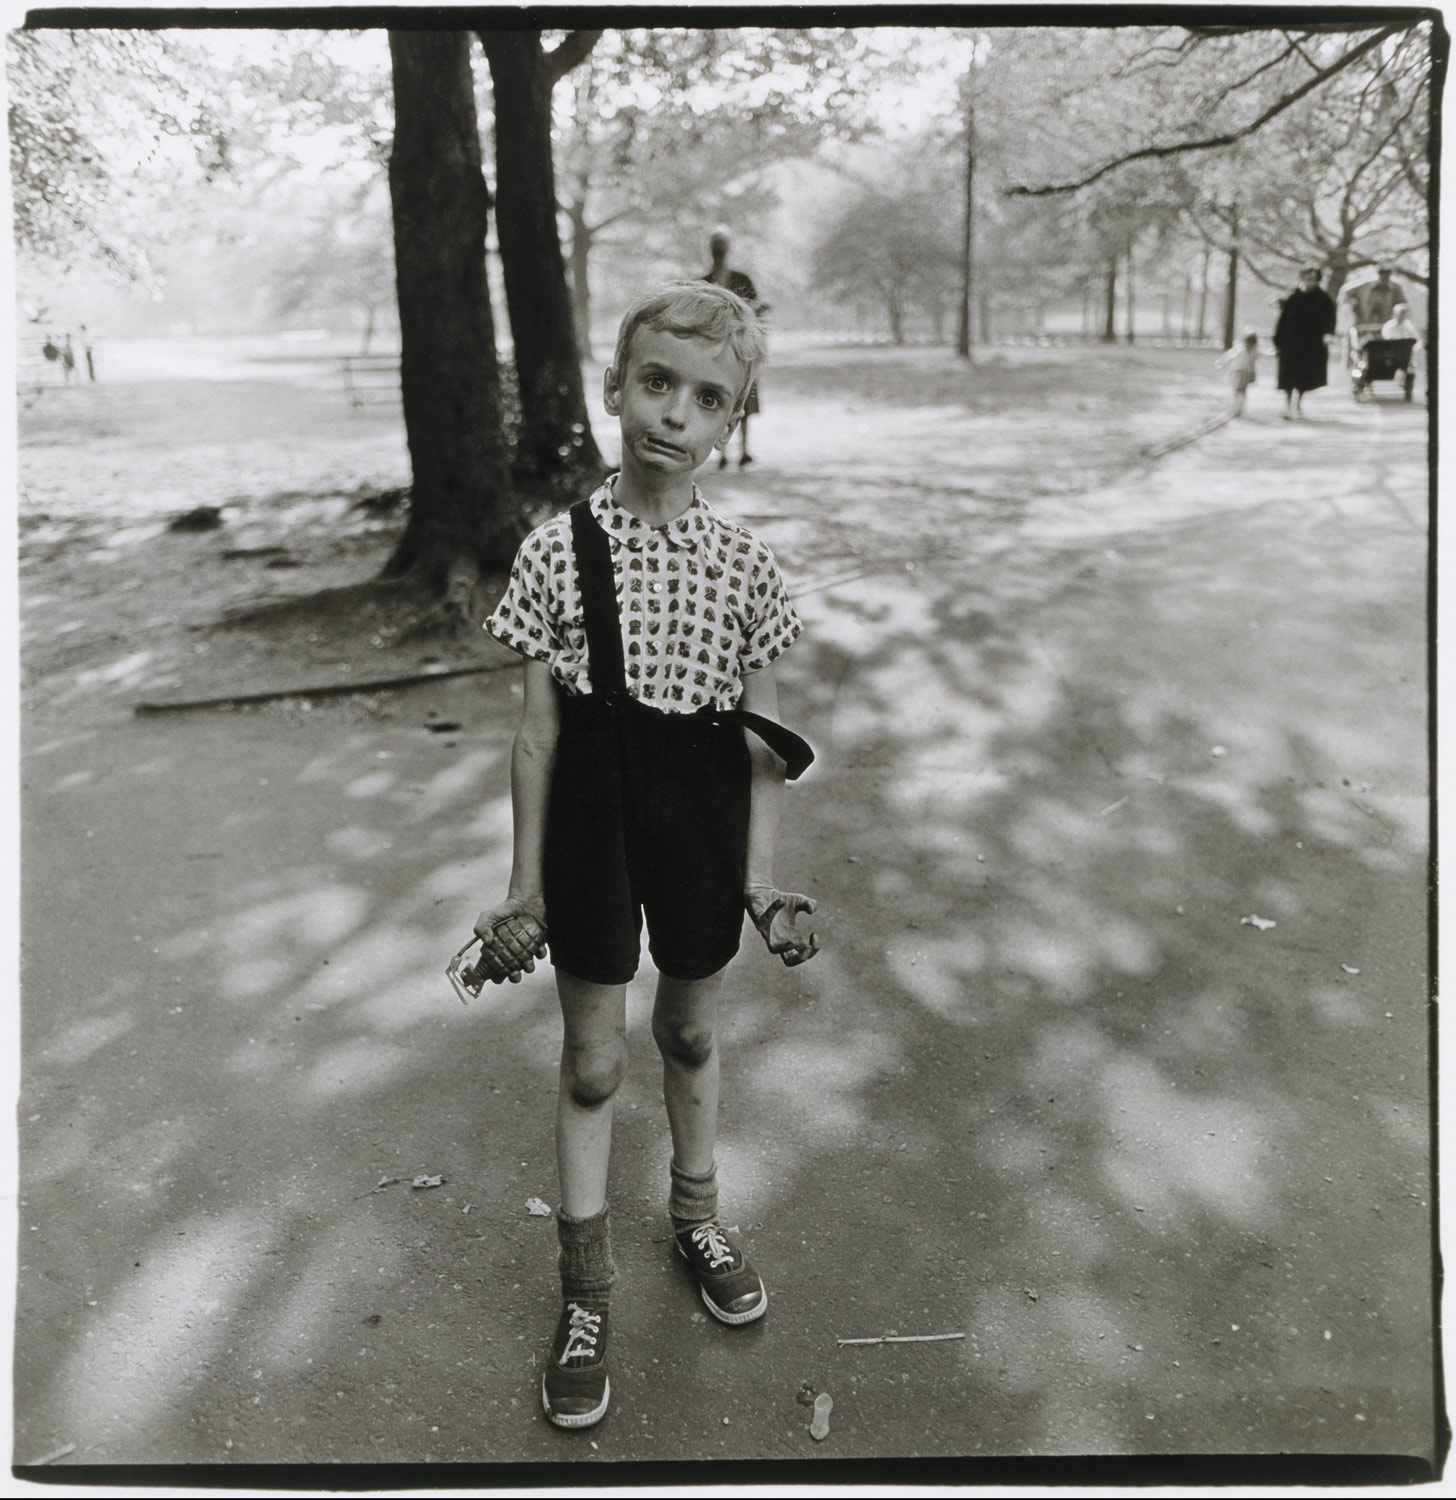
“A
photograph is a secret about a secret. The more it tells you, the less you
know.”
Diane Arbus
Diane Arbus
Photography
2 (AKA Photo 10) is
an exploration of the visual world around us as we collect memories, thoughts,
and ideas by capturing light. In class students learn how to use and operate
cameras, from point and shoot to manual cameras composition, symbolism,
concepts, and issues. Students are introduced to a wide spectrum of the medium
from darkroom to digital. Upon completing Photography 2 (10), the
student will be able to identify and compose a successful photograph, and learn
how to use the camera as creative tool to document life and as a means for
artistic expression. Students will learn
more advanced photographic concepts and processes from film to digital
processes.
- Blog- Create a blog that includes inspiring photos from the internet, and your own original work. There will be small deadlines and a final submission- This project will be on going throughout the semester
- Home - Get creative with composition and learn how to push the rules of photographic composition to create thoughtful imagery.
- Solargraphy [Pin Hole]- Learn about light. Take photos with a basic box.
- Aperture- Learn about light, and how to control the movement of your photos.
- Panorama/Scale- Take multiple images of landscapes that look like they are somewhere else in the world. Collect images by David Hockney for your journal.
- Studio Lighting portraits- Learn how to set up lights and control your environment. Be a studio Photographer- it’s fun
- Computer Manipulation- Learn how to be creative with Adobe Photoshop.
- Photographic Comic Strip- Tell a story through a series of images and thought bubbles.
Evaluation will be based on the following:
Questions, Vocabulary (knowledge): 10%
Journal/Photo Diary (display knowledge of concepts,
gather ideas): 20%
Contact Sheets (skill):10%
Projects /Prints (skill): 60%
Tuesday, May 22, 2018
10s Panorama
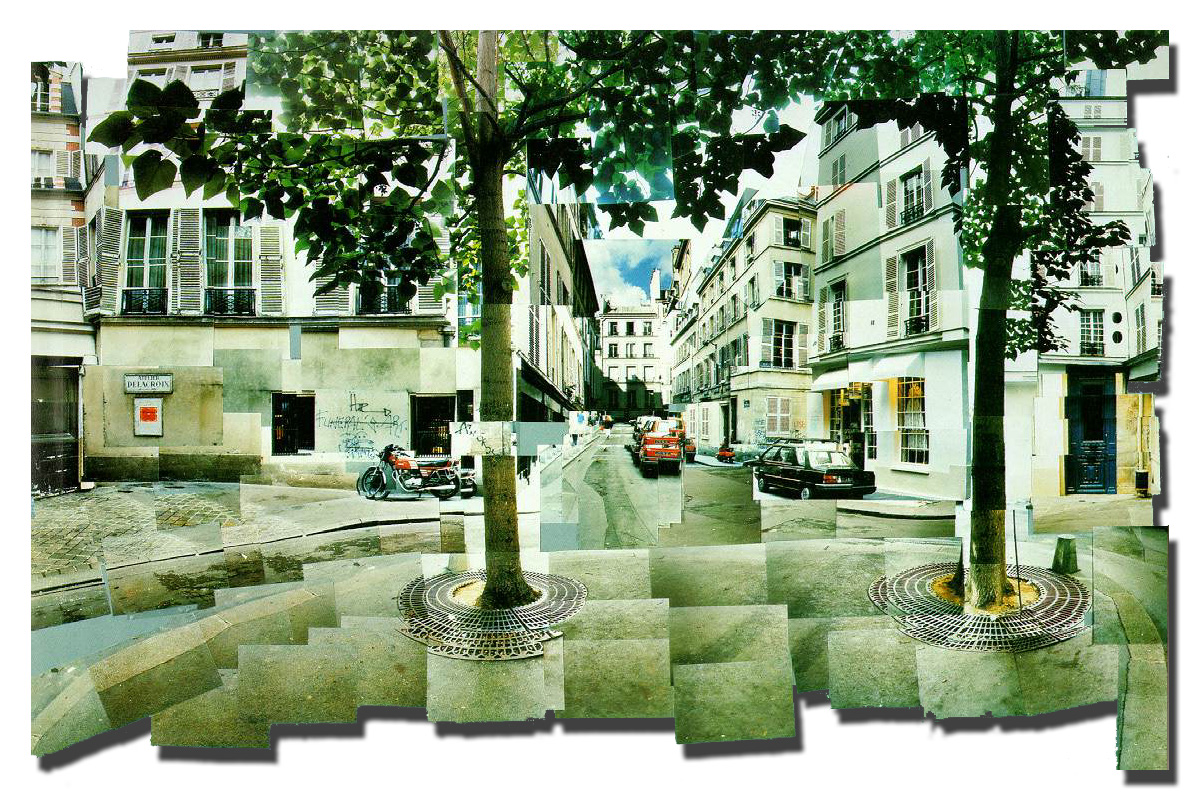
| Photo 1 David Hockney |
Landscape Panorama- You are going to take a series of photos of a single topic in a side to side, or top to bottom sequence so that they can be stitched together.
The scene is up to you, but I want to to experiment in a David Hockney-esk way. See photo 1. Hockney uses multiple photos to create a scene, but not of the photos have the same exposure, or the same range of focus. Also, if you look closely, you will see that he even changes his position slightly to create optical illusions- notice the tree, you can see through it.
David Hockney is painter from Great Britain who migrated to U.S.A. in the 1960's and found the land so grand (particularily the Grand Canyon) that it could not be photographed in one shot. Also he did not like the how the wide angle lens would distort the scene. So he decided to photograph a scene in a series and join it together. He called this collaging process "joiners".
1. First explore the work of David Hockney, find 2 panorama/"joiners" and put them in your journal/blog.
2. Then take multiple (9+) photos of a scene in a linear/layered/connected way that match up- try at least three different locations.
3. Download/develop and create a contact sheet (27-40 images). You can shoot in a sequence where your contact sheet forms your panorama- shoot left to right, 5 across 2 or more rows. See below example. Easier if you shoot in landscape format.
4. And then either using Photoshop, or scissors and glue assemble your (9+ photos) panorama- each image 3.5 x 5 post to your journal.
5. Have fun, be creative.
![]() |
| Contact sheet panorama |
10 Comic Strip Narrative
Tell a story in photographs and arrange it in a comic strip like series. Your series will consist of 7 or more descriptive photographs to tell your story. Use thought bubbles and narrative description boxes only to clarify your ideas and the actions and thoughts of the characters. Use real people, not dolls or action figures, but you can use inanimate objects as your subject i.e. "the day in the life of an apple". Be descriptive with your imagery. Remember lighting, and depth of field techniques when photographing each image. You will be digitally enhancing your images to manipulate colour. Arrange your images to tell a story. You can add drawings, hand colouring, scribbling, and collage to you comic.
- Brainstorm- your story ideas, write down your narrative, can be in point or paragraph form.
- Storyboard- plan your images in frames. Include a close-up, medium shot and long shot to establish the space.
- Shoot- Photograph your story either digital of BW.
- Download or develop your negatives (scan negatives).
- Digitally enhance the colour and contrast in the images.
- Arrange in a comic-like narrative sequence (can use Comic Life).
- Print or post in your journal/blog.
Wednesday, May 9, 2018
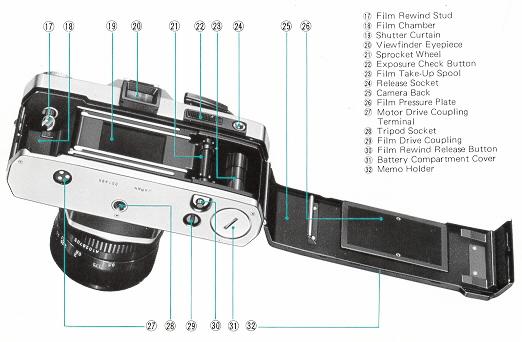
9 Camera Vocabulary
- SLR
- Lens
- Shutter
- Shutter Release
- Aperture
- ASA/ISO Film Speed
- ASA/ISO Film Speed Dial
- Shutter Button
- Rewind Knob
- Frame Counter
- Hot shoe
- Depth of Field Scale
- Film Rewind Crank
- Focus Ring
- Exposure Meter
http://www.betterphoto.com/exploring/allDefinitions.asp
http://www.mir.com.my/rb/photography/glossary/terms_a.htm
http://www.guidetofilmphotography.com/glossary.html
Wednesday, April 18, 2018
Photography Progress Check List
Favorite Photo
TED reflection David Griffen
There's No Place Like Home
Photoshop name banner
Lines Leading Lines, Horizon Lines
Camera Modes or 10s Advanced Camera Modes
Photoshop Enhance Image- Before and After
Technical Challenge:
Shutter Speeds or Aperture
1 contact sheet and 3 to 5 images that show a range of experiments (from assignment criteria suggestions). Identify the experiment, shutter/aperture settings used.
TED reflection David Griffen
There's No Place Like Home
Photoshop name banner
Lines Leading Lines, Horizon Lines
Camera Modes or 10s Advanced Camera Modes
Photoshop Enhance Image- Before and After
Technical Challenge:
Shutter Speeds or Aperture
1 contact sheet and 3 to 5 images that show a range of experiments (from assignment criteria suggestions). Identify the experiment, shutter/aperture settings used.
Subscribe to:
Posts (Atom)


.jpg)