Monday, December 6, 2010

10 Panorama


Landscape Panorama- You are going to take a series of photos of a single topic in a side to side, top to bottom sequence so that they can be stitched together.

The scene is up to you, but I want to to experiment in a David Hockney-esk way. See photo 1. Hockney uses multiple photos to create a scene, but not of the photos have the same exposure, or the same range of focus. Also, if you look closely, you will see that he even changes his position slightly to create optical illusions- notice the tree, you can see through it.
David Hockney is painter from Great Britain who migrated to U.S.A. in the 1960's and found the land so grand (particularly the Grand Canyon) that it could not be photographed in one shot. Also he did not like the how the wide angle lens would distort the scene. So he decided to photograph a scene in a series and join it together. He called this collaging process "joiners".

For this assignment, first explore the work of David Hockney, find 2 panorama/joiners and post them on your blog. Then you are to take a 9+ photos of a scene. Print a contact sheet and stitch it in your journal and then either using Photoshop, or scissors and glue assemble your panorama- each image 3.5 x 5. Have fun, be creative.

Wednesday, November 17, 2010

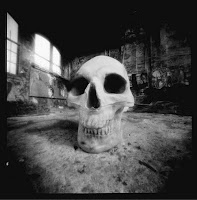
9s Pin Hole Camera

Find 2+ examples of pin hole cameras for your Journal and 3-5 photos that were taken with a pin hole camera. Define what a pin hole camera is and how it works.
 
Here is a site to check out:


The Pin Hole Camera Assignment:
You are to use a basic box that is completely light tight as a camera.

Try to take photos with your box by loading the photo paper in the darkroom and going outside to take your photos. Make sure you keep track of the time and hold steady with each exposure (a tripod can be handy).
You are to try the following exposures:
  1. Clear Subject- image is in focus, good exposure, subject is easy to identify.
  2. Double Exposure- Expose your photo paper 2 times. You image should still be clear and easy to see.
  3. Movement- Make sure you can identify your image. The movement should be very slow.
  4. Positive of one of the above. Use the enlarger to invert the darks to light and visa versa.
  5. Label all of your experiments and hand in.

Monday, November 15, 2010

Workpress Blogs

If you want to keep it private, but want to restrict viewers, then go to "Settings", on the left hand tool bar, then select "Privacy" and Select the third button "I would like my blog t be private, visible only to users I choose. Then select "Save Changes" and then type in my email address when it refreshes.

Monday, November 1, 2010

Photo9- BW Surveillance Project

Surveillance Contact Sheet & Prints
Contact Sheet- make sure you have the following:

Good quality negatives, well developed. 2
Negatives are organized in the same direction- not upside down or backwards 2
Good Exposure- not too dark or light 2
No Flaws, Chemical stains, scratches 2
Professional- Paper has been cut to the size of negatives- not wasteful. 2
Total 10

3 Prints- each print will be out of 5 marks:
Filter # none 3/90 5/150- Label each print with filter number

Good Exposure and contrast- not too dark or light. 1
Image is focused 1
Photo has an even border 1
Photo is cut to 3.5 x 5 1
There are no technical flaws. 1
Total 5 each

Wednesday, October 6, 2010

The Camera

Today we are going to learn about the camera


Cameras and Parts of the Camera
find examples and define:
  1. SLR
  2. TLR
  3. Lens
  4. Shutter
  5. Shutter speed control
  6. Aperture 
  7. ASA/ISO/Film Speed
  8. ASA/ISO Dial
  9. Shutter Button
  10. Rewind Knob

Monday, October 4, 2010

Hand in your Journal/Email your Blog

Today you journal is due:
  1. Make sure you have a title page (include your 1st name, image and PhotoD2)
  2. Your photoshop portrait,
  3. 1st surveillance photos with your reflections.

Then we are going to look at your surveillance photos.
Then we are going to discuss Surveillance #2. and the camera and BW film.

Thursday, September 30, 2010

photoshop portrait

This is Alyssa's Photoshop masterpiece

Wednesday, September 22, 2010

Reflect upon surveilance session1

Look over your photos and select your 5 favourites, create a file for your 5 best copy or move then to the file.
Reflect on your experiences using the following questions to guide you:
  1. Where did you set up your camera first?
  2. Why did you select the area to survey?
  3. How long did you remain in the same area?
  4. What sort of images did you capture?
  5. Were you satisfied with the results? Why or why not?
  6. Describe your favourite image; explain why it is your favourite.
  7. How did people react to you?
  8. How did you feel while you were taking the photos? Anxious, awkward…

Exposed1:Surveillance

Today you are to go out to take surveillance photos around the school. Find a space that you find interesting either the background is compositionally, structurally compelling, or there is significant action there that may tell a story. (Remember that changing rooms, bathroom and the staff room are off limits). Set up your camera (like Lorca Di Corcia) and wait for something to enter the frame. stay in the same place for 10-15 mins then change your position and try somewhere else. Take 25+ frames and when you feel like you have something interesting, come into the class and download them.

Monday, September 20, 2010

Exposed: Voyeurism, Surveillance & the Camera

Henri Cartier Bresson
Last summer I visited the Tate Modern Gallery in London. I saw an exhibition that inspired this project. Since its invention, the camera has been used to make images secretly to satisfy the desire to see what is hidden. Exposed: Voyeurism, Surveillance and the Camera examines photography's role in voyeuristic looking from the middle of the nineteenth century to the present day. It includes pictures taken by professional photographers and artists, but also images made without our knowledge on a daily basis through the proliferation of CCTV.

Check out the web site: Tate Modern
and also see: The Tate Modern Channel
Make sure you view Philip Lorca-DiCorcia and Laurie Long.

In class we will explore various Photographers who have explored the world candidly as voyeurs and photojournalists to document life as it happens without prejudice.


Robert Frank

Philip-Lorca DiCorcia

Laurie Long


Weegee

Nan Goldin

Sunday, September 19, 2010

Photoshop Portrait

We are going to learn how to use Adobe Photoshop to edit and alter your portrait. You are going to copy parts of other portraits onto your face to make a new combined face. To do this, you will learn basic tools: rectangular marquee, lassoo, quick mask, how to cut & paste, move tool, dodge and burn, image adjustments.

First open the photograph taken of you in Adobe Photoshop, then open another image from your group that you want to blend parts onto your photo.

We will then use the recangular marque tool to select an area of your photo to copy. Then selcet the photo of you and Edit>Paste. Use the move tool to adjust the size and move into place.

Interview & Portrait

In class we are going to get into groups of two and interview your classmate (hopefully some one new to you). You are to ask them several questions about them selves:

  1. Name & major?
  2. What is your favourite food?
  3. What is your best memory of last summer?
  4. Worst memory of the summer?

Then take a digital portrait of your partner and download it onto the network into the class folder. Photo 9_10>Faces. We will be sharing your interview and your photo with the class.

Monday, September 13, 2010

Welcome September 2010

Welcome to the Photography 9/10 blog. This blog will be updated each week to keep students up to date of classroom activities, events, instructions, and assignments. Check it regularly.

Tuesday, June 15, 2010

Final Journal Term 2

Photo 10 Journal
  • 3 Depth of Field (found- short medium, long lable the f-stop)
  • 1 Depth of Field- your best
  • 3 Studio- (found) hatchet, rembrandt, Glamour
  • 1 Studio- your best
  • 1 David Hockney Panorama (found obviously)
  • 1 Panorama contact sheet 9+ photos organized in a mini version of your big panorama.

10s- hand in your final panorama printed on good quality paper.

Photo 9 Journal-

  • 5 Shutter Speed (found- blur, freeze, slow pan, fast pan, experiement)
  • 1 shutter- your best
  • 1 Pin Hole (found)
  • 5 Elements of Design (found)
  • 5 Portraits Natural Light (found)
  • 1 Portrait- your best

9s- hand in the rest of your portraits printed with different filters in a sleeve, please label the filters.

Tuesday, May 25, 2010

Photo 10- Panorama

Landscape Panorama- You are going to take a series of photos of a single topic in a side to side, top to bottem sequence so that they can be stitched together.

The scene is up to you, but I want to to experiment in a David Hockney-esk way. See photo 1. Hockney uses multiple photos to create a scene, but not of the photos have the same exposure, or the same range of focus. Also, if you look closely, you will see that he even changes his position slightly to create optical illusions- notice the tree, you can see through it.
David Hockney is painter from Great Britain who migrated to U.S.A. in the 1960's and found the land so grand (particularily the Grand Canyon) that it could not be photographed in one shot. Also he did not like the how the wide angle lens would distort the scene. So he decided to photograph a scene in a series and join it together. He called this collaging process "joiners".

For this assignment, first explore the work of David Hockney, find 2 panorama/joiners and put them in your journal. Then you are to take a 9+ photos of a scene. Print a contact sheet and stitch it in your journal and then either using Photoshop, or scissors and glue assemble your panorama- each image 3.5 x 5. Have fun, be creative.

Wednesday, May 12, 2010

Photo9- Elements of Design


Find examples of the Elements of Design in Photography:
Line, Shape, Form, Texture, Colour

Line
A line represents a "path" between two points. A line can be straight, curved, vertical, horizontal, diagonal, or zigzag. Lines imply motion and suggest direction or orientation. The direction and orientation of a line can also imply certain feelings. Horizontal lines imply tranquility and rest, whereas vertical lines imply power and strength. Oblique lines imply movement, action and change. Curved lines or S shaped lines imply quiet, calm and sensual feelings. Lines that converge imply depth, scale and distance - a fence or roadway converges into the distance provides the illusion that a flat two-dimensional image has three-dimensional depth. A line is an effective element of design because it can lead the viewer's eye. To create more effective photographs actively look for lines and arrange them within your viewfinder to invoke specific feelings.


Shape 2-D
Shapes are the result of closed lines. In photography, shapes can be a color area or an arrangement of flat, 2 dimentional objects within the camera's viewfinder. Some primary shapes include circles, squares, triangles and hexagons. Space is defined and determined by shapes and forms. Light coming from behind a subject can form a silhouette resulting in object that is completely black against a lighter colored background. Silhouettes appear as two-dimensional shapes lacking form.

Form - 3-D
Form refers to the three-dimensional quality of an object, which is due in part to light, and dark areas. When light from a single direction (e.g. our sun) hits an object, part of the object is in shadow. Light and dark areas within an image provide contrast that can suggest volume. Positive space is where shapes and forms exist; negative space is the empty space around shapes and forms.
Color
There has been a tremendous amount of research on how color affects human beings and some of this research suggests that men and women may respond to colors differently. Color affects us emotionally, with different colors evoking different emotions.
Texture
Describes a surface of an object. Texture can be soft, smoothe, shiney, bumpy, rough, jagged...

Monday, May 10, 2010

Portraits

Grade 9s are going to take photos of people in natural lighting. Here are a couple of photoshoots:

Evolution

Retouching Photos

The Photoshop Effect2

You are to find 5+ examples of portraits in Natural/Available Light.


Here are a few sites to visit with cool portrait ideas:

Shane Oosterhoff's Dog Portraits Part#1

Shane Oosterhoff's Dog Portraits #2

Shane's Site

Greg Swales Photography

Monday, May 3, 2010

Photo9- Pin Hole Project

Pin Hole Project-
You are to use a basic box that is completely light tight as a camera.
Try to take photos with your box by loading the photo paper in the darkroom and going outside to take your photos. Make sure you keep track of the time and hold steady with each exposure.

You are to try the following exposures:
  1. Clear Subject- image is in focus, good exposure, subject is easy to identify.
  2. Double Exposure- Expose your photo paper 2 times. You image should still be clear and easy to see.
  3. Movement- Make sure you can identify your image. The movement should be very slow.
  4. Positive of one of the above. Use the enlarger to invert the darks to light and visa versa.
  5. Label all of your experiments and hand in.

Thursday, April 15, 2010

Shutter/Aperture Contact Sheets Due

Photo 9 - Contact Sheet
Photograph and print out 25-35 examples of shutter experiments (that you took- even if you shared a camera, they should be your photos).

Label the required technique: blur, panning slow, panning fast, freeze frame, and still subject with movement around. Include the approximate shutter speed also.

Print your best example of each - Wallet Sized for your journal.

Photo10 - Contact Sheet
Photograph and print out a contact sheet of 25-25 examples of aperture experiments (that you took- even if you shared a camera, they should be yours).
Label the required technique: short, medium, and long depth of field. Include the approximate aperture settings also.

Print your best example of each - Wallet Sized for your journal.

Thursday, April 8, 2010

Photo10- Aperture/Depth of Field

What is Aperture? is the size of the opening in the lens when a picture is taken. Also called f-stops.

Depth of Field(DOF) is the portion of a scene that appears acceptably sharp in the image.

3 Things Control Depth of Field-

  1. Aperture- smaller the opening= more in focus

  2. Distance to Subject- closer to subject= less in focus

  3. Lens Size- shorter lens= more in focus.

For more information on Aperture and Depth of Field visit Digital Photography School site.

The Assignment-

You are to take a series of photographs to manipulate Depth of Field (amount in focus) by adjusting the aperture on your camera. You are to set up scenarios that have visual depth/distance and a strong subject. For each scenario, you are to take three photos and experiment with your aperture so that you have an example of short, medium and long depth of field. Then set up compositions and consider what depth of field would work best. Print a contact sheet of 25 photos and an example of each (short, medium, long) in your journal.

Wednesday, March 31, 2010

Painting with Light

Here are a few links for the Media Arts students to get some ideas:
Jubilee
Series1

This tutorial the first 5mins are pretty good
Painting with Light Tutorial 2 but I usually use the "B" on the camera.
Another tutorial This guy is cute .

Monday, March 22, 2010

Camera Functions

Finish your portrait and your journal first.
When you are finished~
9s get a camera identification sheet,
10s get a mode identification sheet.

Later (maybe next class), in groups, we are going to identify specific parts of the camera, learn about the different camera functions and what they do, then share with the class


Identify each of these camera modes and identify what they do. You will be assigned a specific camera mode to research with your group and then share with the class.


M A S P


Here is a site for you to check:
Photography Camera Modes
Understanding White Balance
White Balance Icons


Thursday, March 18, 2010

Self-Portrait & Journal Due next class

Work Period Today.
I will show you how to print to paste images into your journal. If you want to purchase a journal, bring $5.
Remember journal bloggers, do not include your last name in your blog and do not post a photo of yourself.

Wednesday, March 17, 2010

Journal

When you finish your photoshop portrait and image perfection you are to begin your journal.
Journal Criteria-
Your journal is an ongoing assignment.
  1. Title Page/self-portrait.
  2. Best of Beauty shoot1.
  3. Best of Beauty shoot2.
  4. Found* Emphasis Techniques(9s) or Breaking the Rules Techniques(10S).
  5. 1 Your Photo Touched-up.
  6. 5 Olympic perspectives.
  7. 5 Random photos that you love.
  8. 5 Found Beauty Photos.

Monday, March 15, 2010

Photoshop Editing

We are going to continue to work with your portraits in Photoshop today.
You are to manipulate a portrait of you using Adobe Photoshop using the following techniques:

  • Touch-up your portrait- ie. lighting, unwanted blemishes...
  • You can manipulate colour (eye, hair colour)- optional.
  • You can have fun with liquify or other filters- optional...
  • Cut your portrait into a background.
  • Type your name, grade and photo level somewhere.


    Here are a few tutorials to help you work on your self-portrait:
    Sizing your image
    Cut & Paste

Thursday, March 4, 2010

Editing portraits in Photoshop

Today we are going to continue to work with your portrait in Photoshop. Even though you may have taken a photo of some one else, make sure you have a portrait of yourself for the first page of your journal. We are going to learn how to use layer masks and how to cut and paste with layers.

Monday, March 1, 2010

Photoshop Perfecting & Play

We are going to learn how to use Adobe Photoshop to perfecting & play with photographs. !st we are going to work together on the same image. We will select a photo that has visual integrity, a strong, and needs some help to make it even beter, but not too far gone.
  1. The "Image" menu and using Image>Adjustment>Levels.
  2. Image>Image Size- what pixels are and the importance of image size. What "Resample" and "Constrain Proportions" means.
  3. We are going to learn about Basic Photoshop Tools: Move tool, Marquee tools, Lassoo Tools.
  4. Then you can play around and do crzy things: I will show you about filters and "Liquify"
  5. We are going to "Save As" so that the original version of the image is retained.

Friday, February 26, 2010

Sharing

Finish the questions form Tuesday and save you favourite image in the Share file today.

Wednesday, February 24, 2010

Emphasis/Breaking the Rules

Both 9s and 10s

  1. Download/develop the photos from last class’ outing
  2. Print out a contact sheet
  3. Label each photo 9s-Emphasis technique used to draw attention to the subject (leading lines, repetition, rule of thirds, contrast and framing). 10s- Breaking Rule technique (tilting frame, cut of heads, strange focal point, creative lighting, "wrong" horizon line, crazy camera angles...)
  4. Then answer a series of questions (see below).
  5. Select absolute favourite and save to "Beauty #2" file in Shared folder.
  6. Share image with class.

Photo9
Choose your best image for each emphasis technique (5 total images). Insert the images into word and respond to each question:

  1. Identify the subject?
  2. Identify the emphasis technique used and how it emphasizes the subject.
  3. Describe what is in the background?
  4. How does this represent beauty?

Photo10
Choose your best image for each emphasis technique (5 total images). Insert the images into word and respond to each question:

  1. Identify the subject/positive space?
  2. Describe what is in the background/negative space.
  3. Identify the rule that has been broken used, and explain how it enhances the theme?
  4. How does this represent beauty?

Saturday, February 20, 2010

Welcome to Photo 9/10

Hey Everyone,

I am going to start a class blog so you can keep track of what we do in class. Check in each class to see what we are going to do. I will try to update this each day we have a class. Those of you who intend to keep a digital journal, I want you to consider "blogger" because it is easier for me to follow you and keep track of your assignments. I will show you how.