Bracket Project AKA- Zone System
Zone Exposure
BW Film Assignment
|
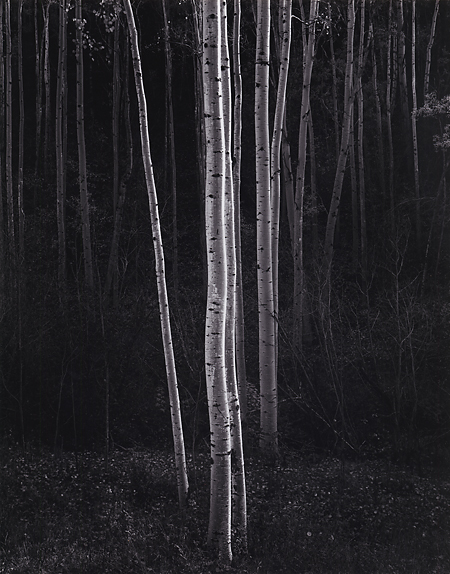
Ansel Adams-
Aspens, Northern New Mexico, 1958
Gelatin silver print
|
Zone System’s Key Concepts
The zone system divides a scene into 10 zones on the tonal scale (though there are variations of 9 and 11 zones). Every tonal range is assigned a zone. Every zone differs from the one before it by 1 stop, and from the one following it by 1 stop. So every zone change equals 1 stop difference. Zones are identified by roman numbers, with the middle tone (with 18% reflectance) being a zone V which is zone 5.
Photographers, usually are only concerned with zones III through VII (zones 3 through 7). The darkest part of a scene would fall into zone III, while the brightest part of a scene would fall into zone VII. Anything darker than zone III would render as pure black with no detail (under-exposed), while anything brighter than zone VII would render as pure white with no detail (over-exposed).
Learning Outcomes.
Learn about how to visualize and control the exposure of the images. Learn basic concept of zone system and exposure theory.
What to Do.
You are to photograph three or more scenes (landscape… go outside).
Step 1- Find an Ansel Adams photo, post it on your blog and identify the different tonal areas on the image. (middle grey, or zone V) to set your
camera exposure to read middle grey. In order to achieve this, get
close to the grey card, so you can only see the card, but careful not to
block the light or shade the grey card. Then stand back to capture your
desired composition. One challenge may be if you are photographing a
vast landscape- something far away that has different lighting than
where you are standing. Measure your exposure on the grey card where you
are and then guess compensate your exposure if the light is radically
different where you are shooting.
And/or use a
Spot Meter to measure specific area to measure the light exactly.
Step 3-
Over Expose your film- Try the Ansel Adams
method of shooting for the shadows and developing for the highlights.
What this means is that you would slightly over expose your film by 1 to 2 stops. Set your ASA 1 to 2 stops lower than film is rated.
Step 4- Shoot
two shots with the exact grey card set-up: shoot one with the grey card
in the photo, and one without. Then “bracket” your photo, two times over
exposed and two times under exposure. For example, if your camera is
set at is f8 and 1/125 for a perfect exposure, to bracket that, change
your aperture to f5.6 shoot and then f4, then the two up for f11 and
f16. Or you could have a similar result with the shutter if you do not
want to affect your depth of field.
Step 5- Under
develop your film 1 or 2 stops (minutes) if you over exposed when shooting.
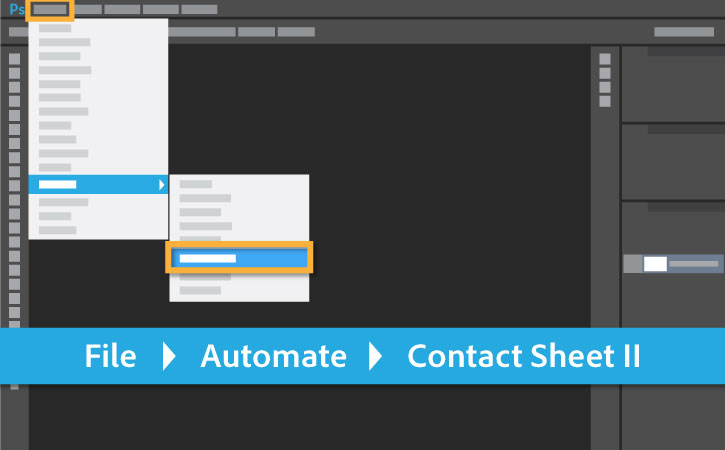
Step 6-
1 perfect contact sheet and 1 perfect 8 x 10 print.
Contact Sheet- 5 marks each Total 25
Shows evidence of bracketing your exposure- 5 variations for each scenarios
Technically good quality negatives
Technically good quality prints (10 zones)
Thoughtful, eye catching compositions
Creative treatment of topic and variations
0 Pure black
I Near black, with slight tonality but no texture
II Textured black; the darkest part of the image in which slight detail is recorded
III Average dark materials and low values showing adequate texture
IV Average dark foliage, dark stone, or landscape shadows
V Middle gray: clear north sky; dark skin, average weathered wood
VI Average Caucasian skin; light stone; shadows on snow in sunlit landscapes
VII Very light skin; shadows in snow with acute side lighting
VIII Lightest tone with texture: textured snow
IX Slight tone without texture; glaring snow


/cdn.vox-cdn.com/uploads/chorus_image/image/47070706/google2.0.0.jpg)
