Here is a quick step-by-step method to create a contact sheet using Adobe Photoshop.
https://helpx.adobe.com/photoshop/how-to/create-contact-sheets.html
[Borrowed from Adobe]
Step 1 of 8:
Put all of the images you want on the contact sheet in one folder on your computer.
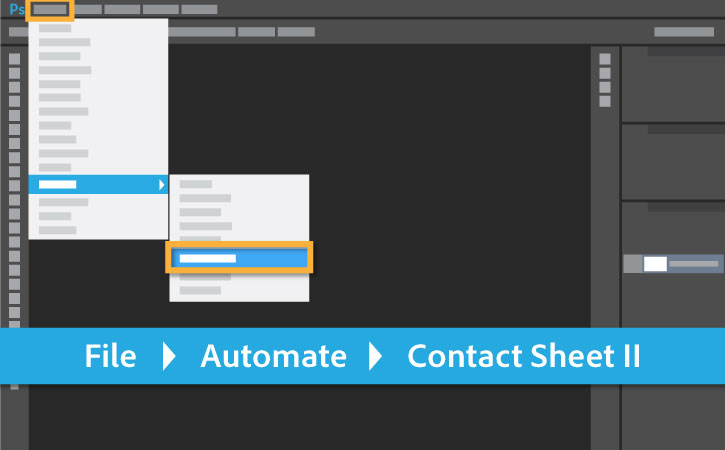
In Photoshop, go to
-Automate - Contact Sheet II.
In the
Source Images section of the Contact Sheet II dialog box, choose the folder that contains your images.
Under
Document, set the Units, Width/Height, Resolution, and Mode (color mode) for the contact sheet.
If desired, select the
Flatten All Layers option.
Under
Thumbnails, decide how you want your images arranged on the page.
Select the
Use Filename as Caption option to label each image based on its file name.
Click
OK and Photoshop will create your contact sheet. You can save or print it from the
File menu.


No comments:
Post a Comment