
Creating a Banner
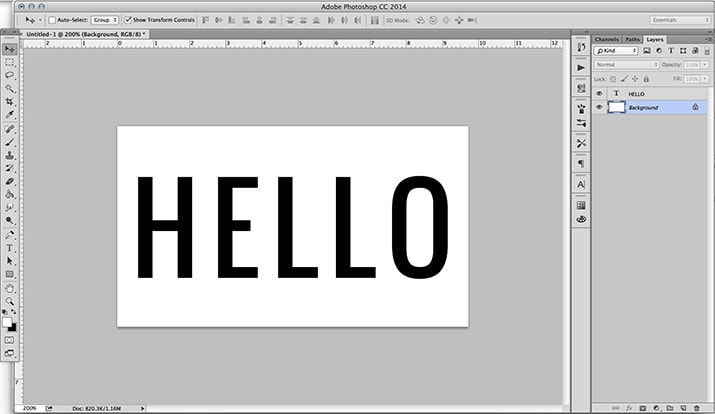
Step One: Create a new document in Photoshop. If your document is going to be used on the web, I recommend setting the resolution to “72.” Next, type out your Name. I chose “HELLO” to keep things simple, but you could also use this tutorial for blog headers, as text to lay on top of photos in posts, etc! For a banner, you create the document as a custom size 1000 x 300 pixels at 72 resolution. Long and skinny.
Make your text BIG and BOLD. Use the option menu on the top of the page to set your font style, size, boldness...
Make your text BIG and BOLD. Use the option menu on the top of the page to set your font style, size, boldness...
Step Two:
Select an image you have taken or find one on Pexel. Select an image that you like and save the image to your folder. Open the image in Photoshop. Select All (or CTR A). Then Copy (or CTR C) and Paste (or CTR V) the image onto your file into the new layer. Then, when you create a clipping mask, your words will take on the effect of the image you’re using, which makes my words look gold!
OR
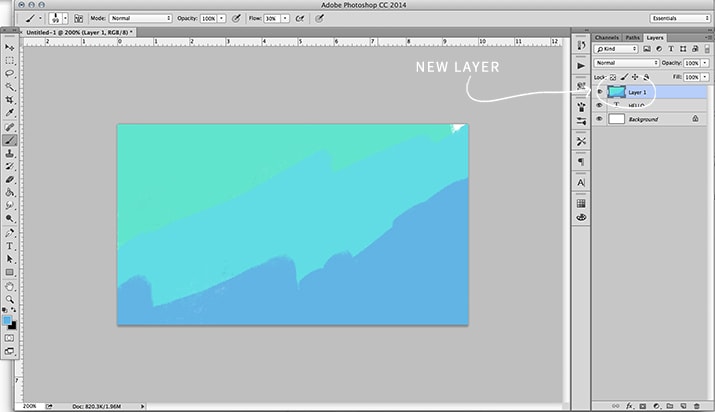
Create a new layer ON TOP OF your text layer. You can create a new layer either by going to Layer >> New >> Layer (in the top menu) OR by clicking the thing that looks like a piece of paper next to the trash can in the bottom right of your layers panel. Your new layer will be blank (white). If you can't see the Layer panel, then click f7 on your keyboard.
Select an image you have taken or find one on Pexel. Select an image that you like and save the image to your folder. Open the image in Photoshop. Select All (or CTR A). Then Copy (or CTR C) and Paste (or CTR V) the image onto your file into the new layer. Then, when you create a clipping mask, your words will take on the effect of the image you’re using, which makes my words look gold!
OR
Create a new layer ON TOP OF your text layer. You can create a new layer either by going to Layer >> New >> Layer (in the top menu) OR by clicking the thing that looks like a piece of paper next to the trash can in the bottom right of your layers panel. Your new layer will be blank (white). If you can't see the Layer panel, then click f7 on your keyboard.
Step Two A: You can draw whatever you want in that new layer. I chose to draw some colorful scribbles using the brush tool.
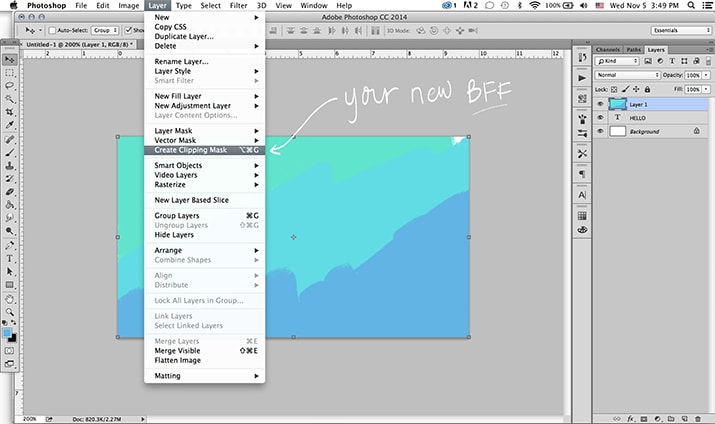
Step Three: Make sure your new layer is highlighted in the layers panel (like mine is). Then, go to Layer >> Create Clipping Mask. A shortcut is to hover between your two layers (in the layers panel) with your cursor while holding down the option key (on a Mac). You’ll see a little arrow pop up and when you click, it will create a clipping mask.
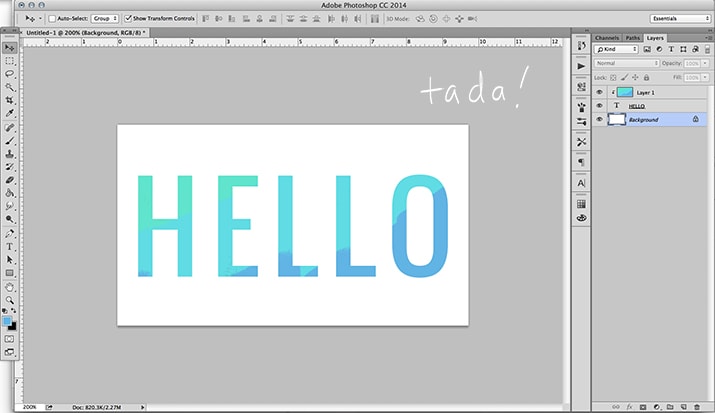
Step Four: Admire your work.
Example of a photo instead of scribble:

Step Five: Post your heading to your blog: find the LAYOUT tab- click on HEADER- and then EDIT- Then remove heading insert instead of Blog title and description. Browse for your image. SAVE.
No comments:
Post a Comment